
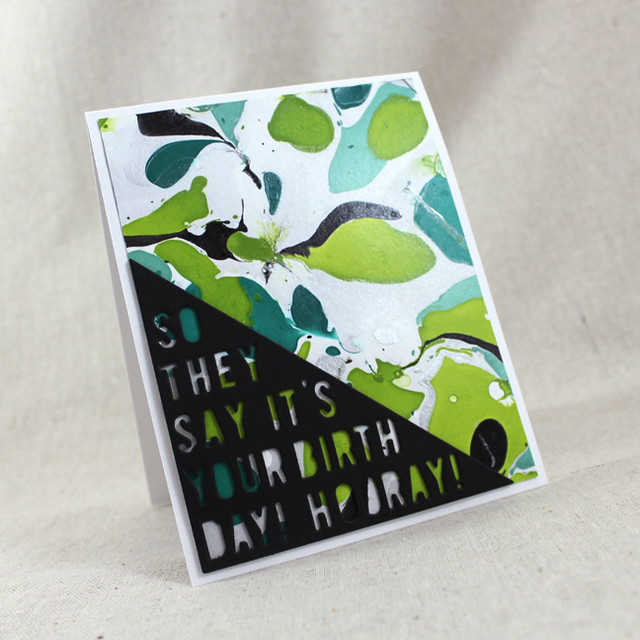
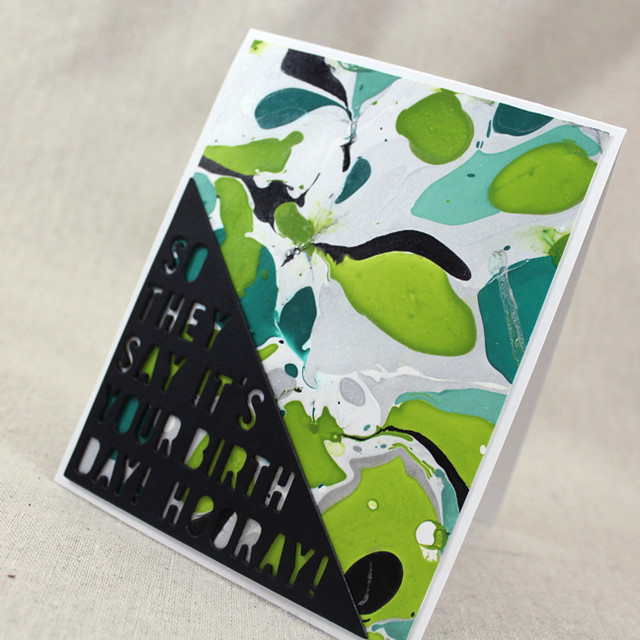
It's a Nail Polish Marbling technique and it's so much fun! You get different results each time, so every panel is unique. I thought it might be helpful to share some tips that I shared in the video and some that I thought of after the fact, so I'm including those here.
1. You don't need anything fancy or special (though you can use what you happen to have on hand, you're really not using that much). I bought a variety of inexpensive polishes from my grocery store. You may be able to find something at a discount store or drug store that would work just as well.
2. I don't wear nail polish, so I wore latex gloves to do this technique. Not wearing nail polish means I don't have nail polish remover either, so this just seemed like the easiest way to stay clean.
3. Just use the skewer or toothpick for short, quick swirls. The nail polish sets up too quickly to do much more than that. You'll end up with a blobby mess on the end of the skewer. Ask me how I know.
4. I tried with both watercolor paper and regular cardstock. I had better luck with the regular cardstock because it was smoother. If you happen to have smooth watercolor paper on hand you could try it to see how well it works.
5. You want to put your paper into the water at a slight angle to avoid bubbles. If you get air bubbles between the polish and your paper it will dry in a skin and then flake off when you touch it.
6. You can clean out your water with a scrap of cardstock between panels. The scrap will attract most of what is left over in the water.
7. Make sure your water is free of all polish before discarding it. I tossed my water outside just to be sure I didn't end up with polish in my pipes or sink.
8. These panels need to dry a very long time. Dry the panels on wax paper to keep them from sticking to your drying surface. I let them dry for several hours before pressing them under a weight overnight to flatten them a bit.
9. I also pressed my panels between wax paper to make sure the nail polish didn't stick to anything. I don't know that it would have, but I wanted to be safe.
10. If there are parts of your panel that you don't love, simply die cut or trim around them. Or use embellishments to hide the unsightly bits.
11. Use nice, strong adhesive for your marbled panels. I suggest Scor-tape or something similar.
12. Make sure you're doing this technique in a well-ventilated area. Nail polish smells.
13. The tub that you use for this technique will get residue along the edges and in the bottom. Make sure you're using something that is either disposable or won't be reused for food.
I hope those tips help! I also hope you play along with this month's challenge. Just link up your project over on Nichole's blog for your chance to win a gift certificate to the Papertrey Ink store. Have a great week!
Supplies:
Black Créme Nail Polish - Wet N Wild; Be More Pacific Nail Polish (dark teal) - Wet N Wild; Mighty Mint Nail Polish - Sally Hansen; Pumping Iron Nail Polish - Sally Hansen; Limestone Nail Polish - Sally Hansen; Xyron
1 comment:
So fun~thank you for the tutorial and tips!! Love your vibrant creation Lizzie~
Post a Comment